Category: Uncategorized

  • How to Build a Content Engine for Slop-Free Content

    How to Build a Content Engine for Slop-Free Content

    As AI has made product development faster, documentation, educational content, sales material, and marketing pages fall behind while the knowledge needed to update them spreads across pull requests, internal documents, Slack, support conversations, and the people building the product.

    AI can produce a draft quickly, but that speed saves little time when a writer still has to reconstruct the context and correct the same quality issues before every publication.

    A content engine gives that knowledge a repeatable path to finished content. It maintains context, turns ideas into drafts, checks their quality, and routes corrections back to the part that needs to improve.

    As those corrections accumulate and models improve, a content engine lets you move from an idea to publishable content in less time.

    This guide explains what it takes to build one. It draws from Morning Brew’s content engine and a demand-led engine I’ve been building at TinyRocket for the past few months.

    Start with a Goal

    A content engine starts with a business goal.

    The goal determines what your content engine needs to know, what it does with that knowledge, where you decide, and what a good result looks like.

    If your goal is to keep documentation aligned with your product, your content engine can capture signals about product changes and customer feedback. It might receive pull requests, changelogs, support questions, and existing documentation as inputs. It can then identify the pages affected by a code change and produce a proposed list of updates for a technical writer to verify.

    That’s a documentation maintenance content engine.

    If your goal is to build topical authority for a developer tool, your engine can search forums like Reddit and Hacker News for problems developers discuss that the product solves. It can turn supported problems into content ideas and group them into themes so your content covers each problem space in depth.

    That’s a demand-led content engine for building topical authority. This is the type of engine I’ve been building at TinyRocket.

    Morning Brew’s goal was to turn employee expertise into credible public content, expanding the company’s distribution. Their engine identifies ideas inside the company, draws out the relevant experience, and prepares the result for publication without asking each employee to become a full-time creator.

    That’s an employee advocacy content engine.

    All three engines use AI agent skills and practices to turn existing knowledge into content. But their inputs, decisions, and outputs differ because their goals differ.

    Once your goal is clear, you can decide what the engine must know and which agents, skills, checks, and workflows it needs to turn that knowledge into finished content.

    What Is a Content Engine?

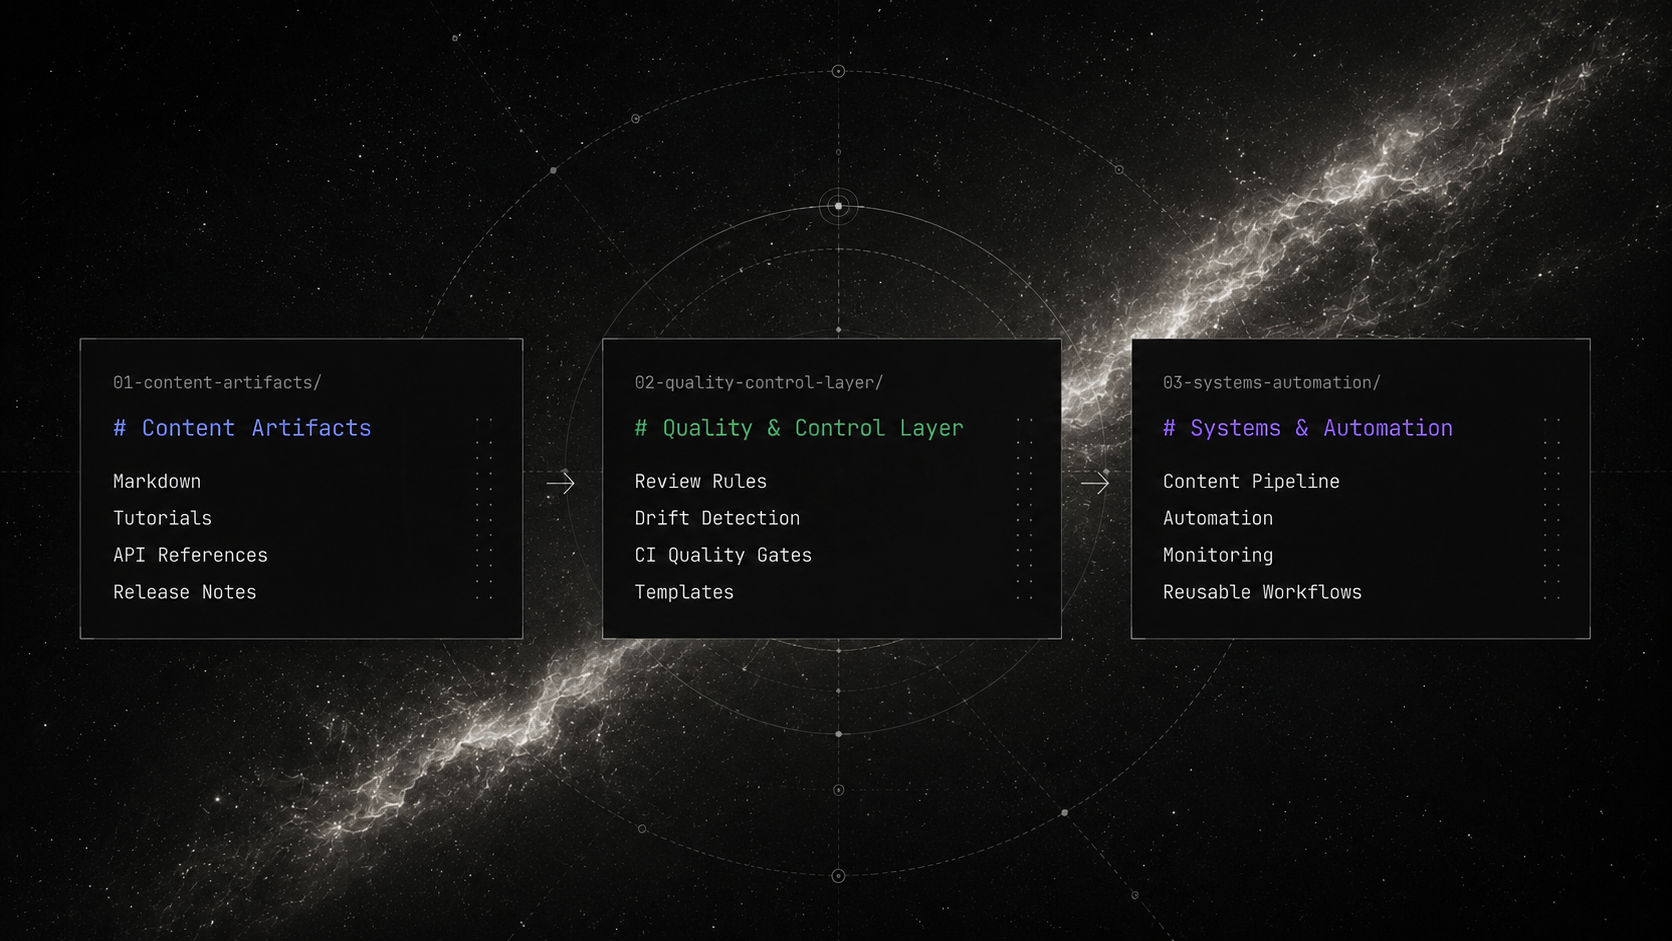
    A content engine combines AI agents and reusable skills with the scripts, integrations, quality checks, repositories, and human decisions needed to turn company knowledge into finished content.

    Each agent or skill performs a defined job and produces something you or the next step can use. An ideation agent might produce ideas for you to review. A writing agent turns approved material into content. Quality checks evaluate the result before publication.

    The agents, skills, checks, and workflows you need depend on your goal and how your team works.

    Alex Lieberman built Morning Brew’s content engine using a combination of agent-specific skills. Their implementation connects skills that scan internal and external sources for ideas, interview an employee, draft in that person’s voice, review the result, and prepare the content for distribution.

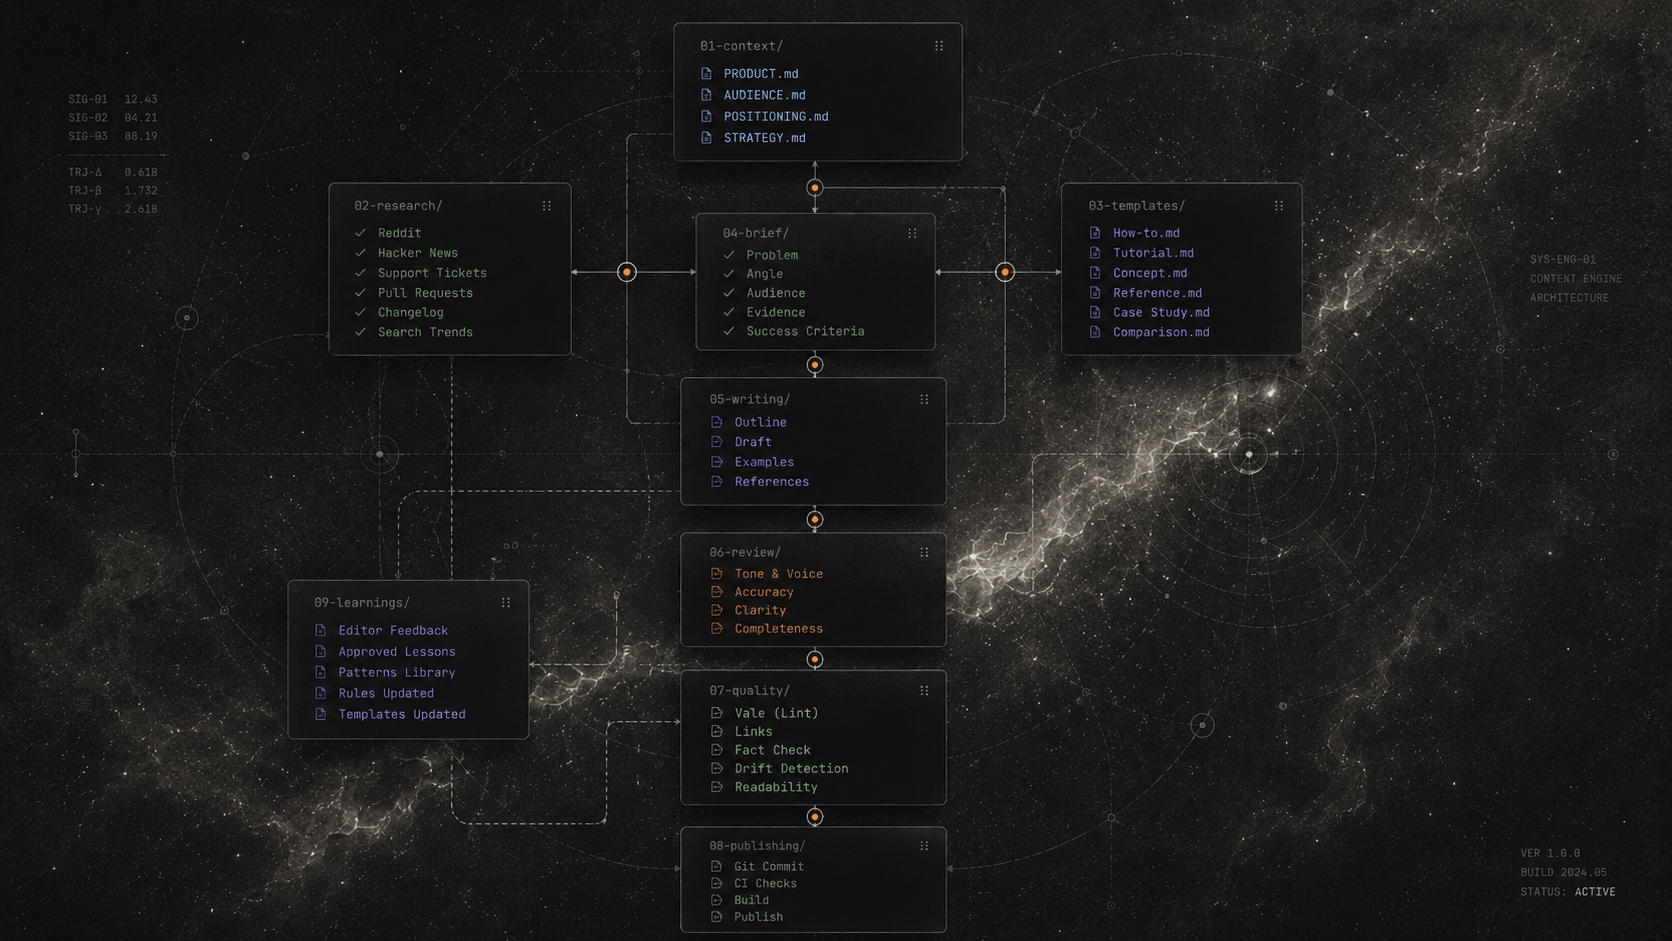
    A demand-led engine uses a different workflow. It can connect research, briefing, angle development, outlining, writing, and review, then use a repository to keep the content, intermediate work, review findings, and approved changes available to each step.

    There’s no one way to build a content engine. Each agent, skill, or check should have a defined input, perform a bounded task, and produce an output you or the next step can use.

    Build Persistent Context

    When an agent starts a task without persistent project context, it doesn’t carry its understanding from one piece to another.

    So, your content engine needs a persistent reference for the product or company knowledge it will use repeatedly. This context could include what your product does, the problems it solves, how you position it, who the relevant audiences are, and the content strategy guiding what you publish.

    Without that reference, you have to explain the same product history, audience assumptions, and strategic choices each time you start a new piece.

    You can create context files in your workspace and reference them in your AGENTS.md (for Codex, Pi, Cursor) or CLAUDE.md (for Claude Code) file.

    A PRODUCT.md file could document the problem the product solves, its capabilities and limitations, category, positioning, and a list of approved and banned claims. An AUDIENCE.md file could describe the roles involved in buying or using the product, the problems each audience handles, what they already know, and the language they use.

    Together, these files give research, planning, writing, and review agents cohesive knowledge to work with.

    Persistent context should contain knowledge that applies across multiple pieces. Recent pull requests, community conversations, and other changing information can remain in the research for the current piece unless they establish knowledge later content will reuse. Keeping that boundary allows the engine to reuse stable knowledge without treating old research as current information.

    The context needs maintenance. You’d usually notice outdated context through an inaccurate brief or draft. Update it whenever the product definition, audience, positioning, or strategy materially changes, or build a workflow that flags possible changes by pulling from PRs, ADRs, and team conversations. Verify those changes before they become persistent context used by later steps.

    In addition to persistent context, you need knowledge sources that continuously bring current information and new ideas into the engine.

    Add a Research and Ideation Workflow

    The research and ideation workflow defines where to look, what information to extract, and how to turn the findings into content ideas.

    To build one, create a skill that points your agent to the sources where you want to generate ideas and guides it on how to turn the findings into usable ideas.

    Your goal determines the sources. If your goal is to create demand-led developer education, use sources such as Reddit, Hacker News, GitHub discussions and issues, search behavior, support questions, customer conversations, and places where developers describe problems in their own words.

    For an employee advocacy workflow, your sources would be internal documents, meeting notes, Slack conversations, and project updates. A documentation maintenance workflow would use product changes, pull requests, changelogs, support questions, and existing documentation.

    Instruct the research skill to retrieve relevant material and preserve the source. For a demand-led engine, the skill should extract the problem being discussed, the language developers use to describe it, the available evidence, its relevance to the product, and the related subject area.

    The ideation skill can then turn supported problems into questions your target audience would actually ask. Generating ideas as questions prompts you to judge whether your target audience would actually ask them. You can instruct the skill to exclude ideas that lack evidence, fall outside the product’s expertise, or duplicate an existing idea.

    Define what a useful idea should contain for your goal. That might include its original source, supporting context, relevance to your audience, or the employee whose expertise it draws from. The output should give you enough information to approve, reject, or refine the idea before it moves forward.

    This is the first human checkpoint in your content engine. Once you approve an idea, pass it and its supporting material to the next step in your workflow.

    Define Human Checkpoints

    You need a checkpoint wherever an agent produces something that could cause a failure for every step that follows.

    For example, if you approve an inaccurate idea, every later step that uses it will carry the problem forward, which only creates more work down the line.

    A checkpoint allows you to review an output, make a decision, or provide knowledge the agent can’t infer. What you review depends on the engine you are building. You could verify the documentation affected by a product change, choose which employee idea is worth developing, review the structure proposed for a piece of content, or confirm that an output represents the intended argument accurately.

    At each checkpoint, review the output before the next step uses it. The output could be a selected idea, proposed documentation changes, captured expert context, a content structure, or developed content. Confirm that it contains the right information and represents your intended direction before allowing it to move forward.

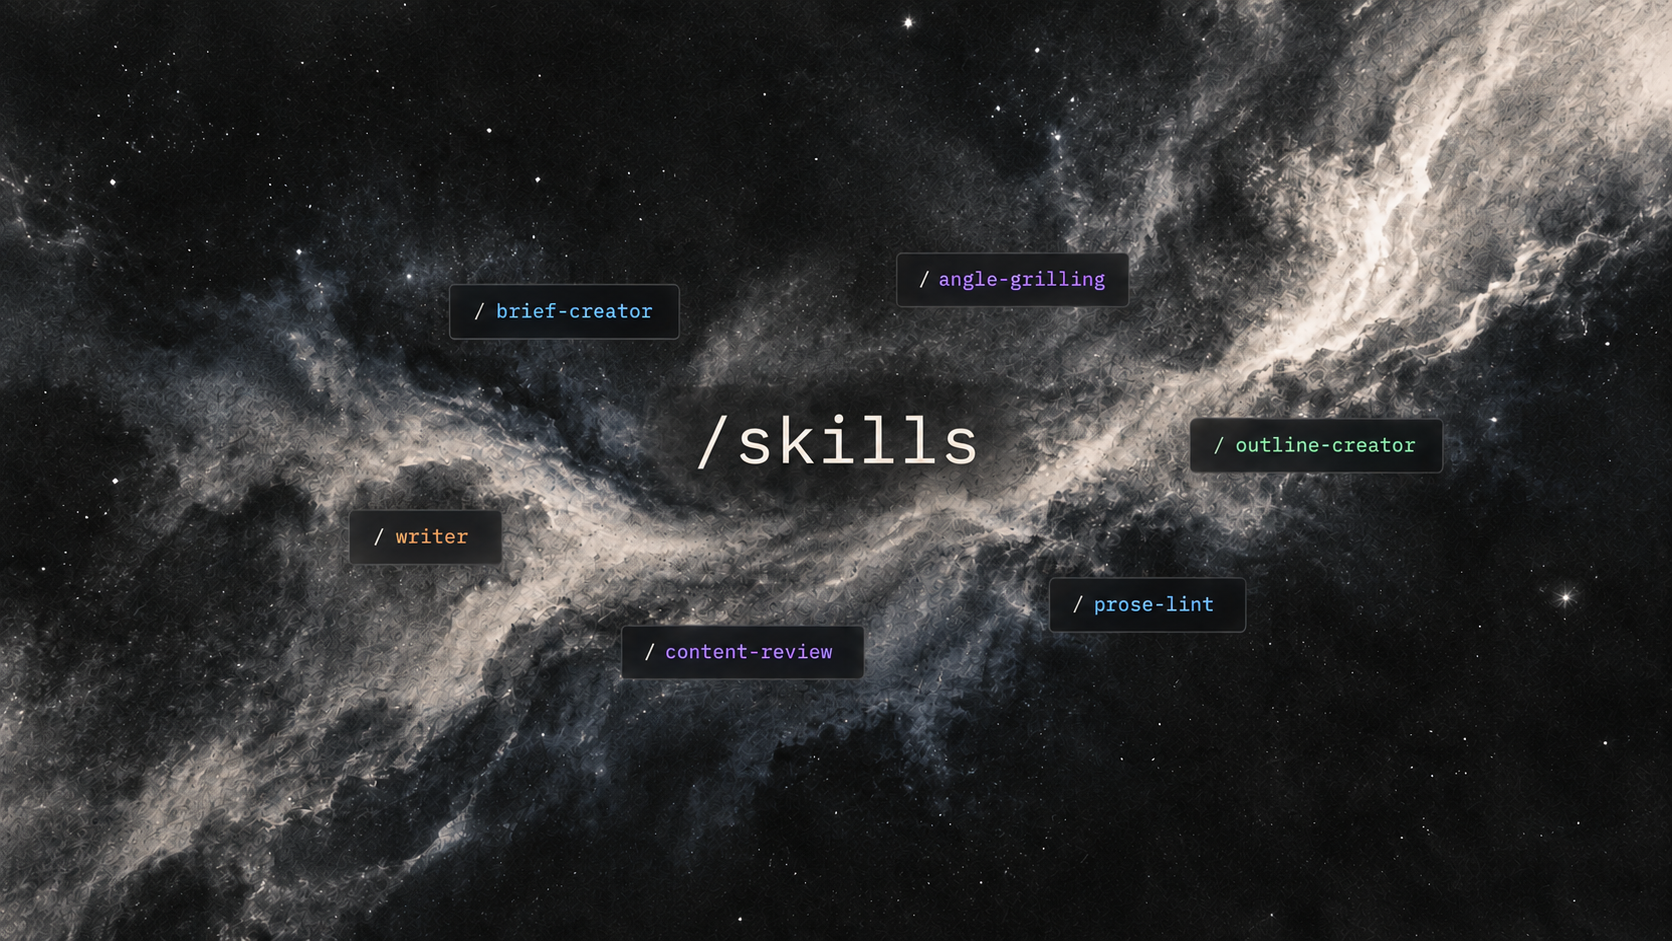
    One required checkpoint we created for the demand-led content engine is the grilling checkpoint. We created an internal skill called angle-grilling, which is invoked before content is developed. The agent uses this skill to ask you about the article’s unique angle and capture context it can’t infer from research. This can include the reasoning behind a position, firsthand experience, relevant examples, operational details, and trade-offs.

    To create your checkpoints, identify where an output could cause problems for the steps that follow. Decide what you need to verify, choose, or contribute at that point, then define what the next action is after you approve its output.

    Build a Template Library

    A template gives your agent guidance for introducing context, developing points, placing examples, and leading the reader toward the intended outcome. Defining that progression early reduces structural rework after the content has been developed.

    Start your library with existing templates. If you’re creating technical content, The Good Docs Project provides templates for concepts, how-to guides, reference content, API documentation, and other technical documentation needs. You can adapt the relevant structures to your content goal and audience.

    You can also create custom templates from existing content with a similar purpose.

    We built a skill that takes 3-4 articles with a similar purpose, identifies how each one structures and develops its points, compares their strengths and weaknesses, and generates a reusable template to guide similar content.

    After generating your templates, instruct the agent responsible for planning or developing the content to apply the matching template whenever it handles something similar.

    Build a Writing Agent

    The writing agent turns your approved material into content using the relevant context, template, voice, and writing rules.

    Build your writing agent in five steps:

    1. Specify its input. The agent could receive an approved idea and research, an employee interview, proposed documentation changes, or another output from an earlier step.

    2. Connect the relevant context. Give it access to the persistent product, company, and audience knowledge required for the task.

    3. Apply a template. The template guides how the content introduces context, develops its points, places examples, and leads the reader toward the intended outcome.

    4. Define the voice and writing rules. A style guide can define requirements such as terminology, point of view, and prohibited language. A voice profile can capture patterns that are harder to express as rules, including sentence rhythm, paragraph length, vocabulary, tone, and how examples are introduced.

    Add a small set of approved examples so the agent can see how those instructions appear in finished content. Choose examples with a similar content type when possible because a tutorial, guide, and opinion article can share the same voice while developing their ideas differently.

    1. Define the output and handoff. Specify what the agent must produce, then pass that output to a human checkpoint when you need to review its substance or to the quality gate when it’s ready for automated review.

    At TinyRocket, our writing skill brings the approved material, persistent context, template, voice profile, writing rules, and sample content together. It instructs the agent to develop the content in the intended voice, address the reader directly, support claims, and preserve the direction established in earlier checkpoints.

    Add Quality Gates for Automated Review and Editing

    Even with extensive instructions, AI-generated content can still contain quality issues. But fixing them yourself would undo the time savings you built the content engine for, which is why you need a quality gate.

    Build your quality gate in three steps:

    1. Define objective quality standards. Write each standard so its meaning can be evaluated consistently. Rather than say, “Use a professional tone,” specify what that means, such as addressing readers directly, defining unfamiliar terms, and avoiding slang that obscures the explanation.

    2. Choose the appropriate review method. Use deterministic checks when a problem has a fixed, identifiable form. Vale can enforce terminology and language rules, while Lychee can check links. Use agent review for standards that require contextual judgment, such as whether a claim has sufficient support or a recommendation explains its reasoning.

    3. Make the review a required gate. The gate must block the content or warn you when it doesn’t meet the standards. At TinyRocket, these checks run locally and in the GitHub CI/CD workflow. Outside a Git environment, you could create a required review skill at the appropriate checkpoint in your content engine.

    The implementation can vary. What matters is that every piece is evaluated against the defined standards before it reaches final editorial review.

    Train The Agent with Your Preferences

    The content can still contain quality issues or writing that doesn’t align with your brand or doesn’t quite sound like you. Do the final review and edit those parts before publication.

    Your final edits provide feedback on what the engine should do differently next time. Instruct the agent to compare its version with your changes and deduce the reasoning behind those edits, then review those deductions before they become guidance for later work.

    This helps your content engine improve each time you use it instead of requiring the same corrections in every draft.

    Use your edits to improve the engine in four steps:

    1. Edit the content. Make the changes required to express the intended ideas, represent the approved sources accurately, and align the writing with your preferences and brand. Use a workflow that preserves enough history for the agent to inspect what changed.

    2. Instruct the agent to analyze your edits. Ask it to compare its version with yours, identify the substantive differences, and deduce the reasoning behind each change. You could create a skill that performs this comparison and proposes reusable lessons.

    If your content lives in Git, the version history already preserves what the agent wrote and how it was edited.

    1. Review and approve deductions that represent your reasoning correctly. Some edits could support several explanations, so an agent may infer a plausible reason that wasn’t the reason you made the change. Correct or reject the ones that don’t.

    2. Apply or store the approved lessons. Update a skill when the lesson changes how the agent should perform a task or move through a workflow. Update a quality check when the lesson describes an issue the review process should catch. Update a template when it changes the information or structure an output requires.

    When the lesson doesn’t fit a skill, quality check, or template, store it in a lessons file the agent consults during future writing and review. This file is particularly useful for context-dependent decisions, such as when to override one rule or prioritize one preference over another.

    Each edit improves the current piece. Turning the reasoning behind approved edits into reusable guidance helps the engine produce content that’s closer to your expectations in future runs.

    Build Your First Content Engine, Then Make It Yours

    You can get started by pointing your preferred agent to this guide and specifying your content goal.

    For each agent, skill, check, or human checkpoint, specify what it receives, the task it performs, the decisions it makes, and what it passes to you or the next step.

    You’ll get a working first engine version with persistent context, an ideation workflow, human checkpoints, quality gates, and a way to carry your preferences into future work. It would come with a lot of instructions, though, so be prepared to review and iterate to adapt it to your needs.

    You’ll need to refine agent instructions, translate your standards into review checks, and improve context coverage, skills, templates, and checkpoints through use. Our demand-led engine is currently a system of 19 agent skills, a template library, context files, and an automated review gate. Building and iterating on that system took about two months.

    If you’d like help adapting the first version to your workflow, you can book a call. Whether you want documentation maintenance, AI search, employee advocacy, social media, or a developer education content engine, I’ll audit how you currently produce content, starting from your goal, and recommend how to build or improve the engine to achieve the result you need.

    It’s free, no strings attached.

  • Content Engineering vs. Technical Writing: What’s the Difference?

    Content Engineering vs. Technical Writing: What’s the Difference?

    The term content engineer means different things depending on who is hiring.

    If you have encountered the term in job postings, community discussions, or vendor content and wondered how it differs from technical writing, you aren’t alone. Many technical writers already do much of what companies describe when hiring content engineers, so the roles can appear to overlap.

    That raises a reasonable question. Is content engineering a new name for technical writing, or does it describe a genuinely different role?

    This article compares the two based on how companies define content engineering in job postings. It examines what each role does, what employers expect, where they overlap, and whether technical writing has ever fully captured the work the role has required.

    By the end, you’ll have a clearer line between what each role produces, where they overlap, why the distinction matters, and who you should hire based on your company’s structure and needs.

    First, here are some common misconceptions about content engineering.

    Misconceptions about Content Engineering

    These are three common ways people define content engineering or describe what the role involves:

    1. A content engineer is an engineer who writes content. The definition is technically accurate in the same way “a software engineer is someone who writes software” is accurate, but it doesn’t tell you what the person actually does.

    By that definition, a mechanical or electrical engineer who writes installation manuals is also a content engineer. The description fits so broadly that it creates confusion about what the person does.

    If a software engineer does software engineering, then a content engineer should do content engineering.

    1. Content engineering is a new name for technical writing. Companies have repeatedly renamed technical writing as a discipline. Titles like content developer, information developer, and knowledge engineer have appeared, and each time the scope stayed the same while only the name changed.

    Mark Baker, author of Every Page is Page One, noted as far back as 2013 that “the constant and uniformly unsuccessful attempts to rename technical writing left many in the field hypersensitive” to yet another name for the same work.

    Many technical writers look at what people describe as the requirements for a content engineer and see things they already do, so the obvious conclusion is that the new role is another name. However, it raises the question of whether technical writing was ever a complete title for the role.

    1. Content engineering is about scaling content production. This is more common within the search marketing and B2B SaaS industry. Some vendors such as AirOps and another content marketing vendor define content engineering exclusively as building AI production pipelines for scaling content.

    In the developer tool space, content goes beyond blog posts. It also includes documentation. Content engineering could involve building drift detection systems, quality gates, review automation, and maintenance workflows.

    That work has nothing to do with producing more marketing pages.

    What a Technical Writer Does

    A technical writer’s primary output is content, including API documentation, integration guides, SDK references, tutorials, release notes, and changelogs.

    They research the product, talk to engineers, test the software themselves, and translate that understanding into content that developers can use.

    Beyond producing new content, technical writers maintain what already exists. When they spot inaccuracies or style issues in shipped content, they update the affected pages. When the product ships a new version, they revise the docs to match. This ongoing maintenance work is a significant part of the role and often takes more time than writing new material.

    Technical writers work within content systems. They open pull requests, follow the review process, and publish through the Docs as Code pipeline. The pipeline itself, however, isn’t their core responsibility. They operate inside the workflow rather than building or maintaining it.

    That said, the industry has been shifting. As companies adopted Docs as Code workflows, roles like documentation engineer emerged. These were people who owned the system for producing and maintaining documentation, rather than the content alone. Some technical writers moved into that work, a shift that predates the current content engineering conversation.

    What a Content Engineer Does

    A content engineer’s primary output is systems, not content. They build the infrastructure that content moves through, including pipelines, automation, quality gates, and workflows.

    Their work can involve building documentation systems, including drift detection that flags outdated docs when product code changes, prose linters, automated reviews in CI, maintenance workflows, and reusable templates that reduce effort per update. This is documentation engineering work.

    However, content engineering also covers marketing content systems, including production workflows, quality enforcement, topic research workflows, and maintenance automation that keep published blog posts and guides aligned with the product as it evolves.

    While documentation engineering covers docs infrastructure, content engineering extends that work to marketing systems as well.

    The Overlap and Difference

    Content engineers and technical writers share the same content environment, tooling, and quality concerns.

    Both roles use the same publishing environment, review process, and quality standards, which is why the distinction can feel blurry, especially in small teams where the same person may write content, maintain workflows, and improve the tooling around publication.

    If the primary responsibility is producing content, that’s technical writing. If the primary responsibility is building and maintaining the systems that content moves through, that’s content engineering.

    A technical writer improves the content inside the workflow. A content engineer improves the workflow itself, including the review rules, automation, quality gates, publishing process, and maintenance systems around the content.

    For practitioners who were already building pipelines, configuring automation, and designing workflows alongside their writing, “technical writer” was never the most accurate description of the full scope.

    Content engineering names that systems work more precisely.

    Deciding Who to Hire

    A technical writer’s job is as valuable as ever. The question is which role gets you to your goal faster, given your team’s structure.

    For teams with significant content volume, building systems that produce and maintain content delivers more leverage than managing each piece manually.

    If you already have a technical writer who’s been building tooling and automation alongside their content work, you could formalize that as their primary responsibility. They already understand the content, and now they’ll own the infrastructure as well.

    If the systems work is complex enough and your writer’s time is better spent on content, hiring a dedicated content engineer is the better move. That way, your writer isn’t split between deadlines and infrastructure, and your systems get the dedicated attention they need to stay reliable.

    Or you outsource the engineering work.

    TinyRocket builds content engineering systems for developer tool companies. Content pipelines, quality automation, drift detection, and production workflows keep the systems work off your team’s roadmap, so they can focus on producing and maintaining content. Whether you have a technical writer who needs systems support or no dedicated content person at all, book a workflow audit to map your current content workflow and identify which parts automation can handle.

  • How We Catch Documentation Drift with Pi and GitHub Actions

    How We Catch Documentation Drift with Pi and GitHub Actions

    According to Linear, teams using AI agents now ship 5x as many pull requests as two years ago, while Cursor’s data shows developers produce 2.5x as much code as 18 months ago.

    More code and faster shipping make documentation drift from the product. Documentation describes one behavior, while code produces another. This hinders adoption, breaks onboarding workflows, and can drive prospective users to competitors or frustrate existing ones.

    Tools such as Mintlify offer features to catch documentation drift and automatically update your docs. However, Mintlify’s implementation may not fit your existing workflow, and it locks you into its platform. This guide shows you how to build the same capability without locking into any specific product.

    This guide walks through the GitHub Actions workflow we use to catch documentation drift on pull requests with Pi, an open source agent harness. You can replicate the workflow on your own repository.

    We’re already running this setup on VectorLint, an open source content review harness we maintain at TinyRocket.

    Let’s get started.

    What You’ll Build

    By the end of this guide, you’ll be able to detect documentation drift in CI. You’ll have three pieces wired together:

    1. A GitHub App installed on the repository that gives the workflow permission to post comments
    2. An agent skill that tells the agent what counts as documentation drift
    3. A GitHub Actions workflow that orchestrates the check on demand, builds the agent’s routing message inline, and posts the result as a PR comment

    Note: The workflow flags documentation drift; it doesn’t create a PR or issue. That’s intentional. There could be false positives where the agent flags drift that isn’t user-facing. Automatically creating a pull request for each false positive only adds review work. You can build a downstream workflow that takes this workflow’s output and creates an issue or PR with an agent.

    Before You Start

    You need a few things in place:

    • A GitHub repository following a Docs as Code approach (documentation alongside the code, for example, /docs or a README markdown file)
    • Owner or member permission on the repository
    • A GitHub account with permission to create GitHub Apps (or an organization where you can create Apps)
    • An API key from an AI provider that Pi supports (Anthropic, OpenAI, Google, and others). This guide uses Amazon Bedrock. If you use a different provider, the only change is the authentication parameters.

    Pi is an open source coding agent that you run from the command line. It’s lightweight, provider-agnostic, and highly customizable, which is why we chose it for this guide. If you want to test the skill before committing it to CI, install Pi locally.

    Note: You can replace Pi with any other agent and get similar results. You’ll need to adapt the setup to how your agent works.

    Step 1: Create the Doc-Drift Skill

    Copy the doc-drift skill from the VectorLint repository into your project at .agents/skills/doc-drift/. The directory contains:

    • SKILL.md: the main instruction the agent follows
    • references/user-facing-criteria.md: defines what counts as a user-facing change
    • references/comment.md: defines the output format for drift reports

    The skill tells the agent to extract user-facing behavioral changes from a PR diff, search the documentation for claims those changes invalidate, and write a report for each finding.

    A user-facing change could be a renamed command-line flag, a new environment variable, a changed config key, or a rewritten error message. The skill ignores internal refactors, test changes, and anything with no observable effect on the user.

    Note: We built this skill for VectorLint, so it has hardcoded scope paths and repository references. To adapt it, change the scope paths and repository name in SKILL.md and update the criteria in references/user-facing-criteria.md to match your product. You can also hand the skill to an agent and ask it to adapt the references to your codebase.

    Step 2: Create and Install a GitHub App

    The workflow needs to post comments on pull requests. You can authenticate with either a personal access token or a GitHub App. A GitHub App is safer because you scope its permissions to exactly what the workflow needs. A personal access token tends to carry more permissions than necessary, which increases the blast radius if it’s ever exposed.

    Use GitHub’s guide on creating a GitHub App and grant it these permissions:

    • Issues: Read & write to post PR comments
    • Pull requests: Read & write for the eyes reaction and gh pr diff
    • Contents: Read for checkout

    After creating the App, grab the App ID and download your private key (a .pem file). Then install the GitHub App on the repository where the workflow runs. You’ll add both values as repository secrets in Step 4.

    Step 3: Build the GitHub Actions Workflow

    Create a file at .github/workflows/doc-drift.yml. Each section below covers one block of this file. The full workflow appears at the end for copy-pasting.

    The Trigger and the Authorization Guard

    To guard against cost and security overhead, a documentation check should only run when someone triggers it on a pull request, not on every push.

    name: Doc Drift Check
    
    on:
      issue_comment:
        types: [created]
    
    jobs:
      authorize:
        name: Check authorization
        runs-on: ubuntu-latest
        # Only run on PR comments that start with /check-docs (skip bots)
        if: |
          github.event.issue.pull_request != null &&
          startsWith(github.event.comment.body, '/check-docs') &&
          !contains(github.event.comment.user.login, '[bot]')
    
        permissions:
          issues: write
          pull-requests: read
          contents: read
    
        outputs:
          authorized: ${{ steps.auth.outputs.authorized }}
    

    The on: issue_comment trigger fires whenever a comment is created. The if: condition narrows triggering to comments on pull requests that start with /check-docs and skips any commenter whose login contains [bot], so bot accounts cannot trigger the workflow. The permissions block grants the minimum access the job needs; write access for comments comes from a GitHub App token (covered below), so GITHUB_TOKEN only needs read access to pull requests.

    To guard against unauthorized reviews, only repository owners and members should be able to trigger the drift check. This limits the cost of running AI models and reduces the surface area for prompt injection.

        steps:
          - name: Generate GitHub App token
            id: app-token
            uses: actions/create-github-app-token@bcd2ba49218906704ab6c1aa796996da409d3eb1 # v3.2.0
            with:
              app-id: ${{ secrets.APP_ID }}
              private-key: ${{ secrets.APP_PRIVATE_KEY }}
    
          - name: Check authorization
            id: auth
            uses: actions/github-script@f28e40c7f34bde8b3046d885e986cb6290c5673b
            with:
              github-token: ${{ steps.app-token.outputs.token }}
              script: |
                const association = context.payload.comment.author_association;
                if (!['OWNER', 'MEMBER'].includes(association)) {
                  await github.rest.issues.createComment({
                    owner: context.repo.owner,
                    repo: context.repo.repo,
                    issue_number: context.issue.number,
                    body: `@${context.payload.comment.user.login} Only repo owners or members can trigger doc drift checks.`
                  });
                  core.setOutput('authorized', 'false');
                } else {
                  core.setOutput('authorized', 'true');
                }
    

    The step reads author_association from the comment payload and allows OWNER and MEMBER. If the commenter is neither, it posts a rejection comment and sets authorized to false. Otherwise, it sets the output to true, allowing downstream jobs to proceed.

    Why a GitHub App token, not GITHUB_TOKEN: As covered in Step 2, issue_comment triggers on public repositories downgrade GITHUB_TOKEN to read-only. The App token you created in Step 2 bypasses this restriction, so every write step in the workflow uses it instead.

    This mitigates the risk of prompt injection since pull request titles, bodies, and comments are user-controlled strings.

    Note: Running an agent in a workflow carries some security risk. A malicious actor could create a pull request containing instructions to get your agent to expose secrets. To avoid that, only grant the minimum permissions your agents need to run. For more on this, read GitHub’s guide on mitigating cloud agent risk.

    Check Out the PR and Fetch the Diff

    The agent needs the diff to know what changed in the pull request and to check for behavioral changes.

      check-docs:
        name: Check documentation drift
        runs-on: ubuntu-latest
        needs: authorize
        if: needs.authorize.outputs.authorized == 'true'
    
        permissions:
          issues: write
          pull-requests: read
          contents: read
    
        steps:
          - name: Generate GitHub App token
            id: app-token
            uses: actions/create-github-app-token@bcd2ba49218906704ab6c1aa796996da409d3eb1 # v3.2.0
            with:
              app-id: ${{ secrets.APP_ID }}
              private-key: ${{ secrets.APP_PRIVATE_KEY }}
    
          - name: React to comment
            uses: actions/github-script@f28e40c7f34bde8b3046d885e986cb6290c5673b
            with:
              github-token: ${{ steps.app-token.outputs.token }}
              script: |
                await github.rest.reactions.createForIssueComment({
                  owner: context.repo.owner,
                  repo: context.repo.repo,
                  comment_id: context.payload.comment.id,
                  content: 'eyes'
                });
    
          - name: Get PR head SHA
            id: pr
            uses: actions/github-script@f28e40c7f34bde8b3046d885e986cb6290c5673b
            with:
              github-token: ${{ steps.app-token.outputs.token }}
              script: |
                const pr = await github.rest.pulls.get({
                  owner: context.repo.owner,
                  repo: context.repo.repo,
                  pull_number: context.issue.number
                });
                core.setOutput('head_sha', pr.data.head.sha);
    
          - name: Checkout main branch
            uses: actions/checkout@34e114876b0b11c390a56381ad16ebd13914f8d5
            with:
              ref: ${{ github.event.repository.default_branch }}
              path: main
              fetch-depth: 0
    
          - name: Checkout PR branch
            uses: actions/checkout@34e114876b0b11c390a56381ad16ebd13914f8d5
            with:
              ref: ${{ steps.pr.outputs.head_sha }}
              path: pr
              fetch-depth: 0
    
          - name: Setup Node.js
            uses: actions/setup-node@49933ea5288caeca8642d1e84afbd3f7d6820020
            with:
              node-version: '22'
    
          - name: Install Pi
            run: npm install -g @earendil-works/pi-coding-agent@0.79.6
    
          - name: Show Pi version
            run: pi --version
    
          - name: Fetch PR diff
            env:
              GH_TOKEN: ${{ steps.app-token.outputs.token }}
            run: |
              DIFF_PATH="$GITHUB_WORKSPACE/pr/.doc-drift-input.diff"
              gh pr diff --repo ${{ github.repository }} ${{ github.event.issue.number }} > "$DIFF_PATH"
              echo "Diff size: $(wc -l < "$DIFF_PATH") lines"
    

    The eyes reaction gives the reviewer immediate feedback that the command landed, before the run finishes. The Get PR head SHA step resolves the pull request’s current head commit, so the checkout targets the right ref.

    The workflow checks out two copies of the repository: main (the default branch, into path: main) holds the doc-drift skill and the current documentation the agent checks against; pr (the pull request’s head commit, into path: pr) holds the changed code. fetch-depth: 0 gives the agent the full repository history, which it uses to reason about how code and documentation relate. setup-node installs Node version 22, which Pi requires (@earendil-works/pi-coding-agent@0.79.6 needs Node ≥22.19.0). Pi is installed at a pinned version (@0.79.6) for reproducibility. The diff is written to pr/.doc-drift-input.diff so the agent can read it from the PR checkout.

    All actions are pinned to full commit SHAs for supply chain safety.

    Build the Agent Message

    You need to tell Pi where to find the diff, which skill to invoke, and where to write its reports. Rather than maintaining a separate script, the workflow builds this routing message with an inline bash heredoc.

          - name: Build agent message
            run: |
              WORKSPACE="${{ github.workspace }}/pr"
              DIFF_PATH="$WORKSPACE/.doc-drift-input.diff"
              cat > /tmp/pi-message.txt <<EOF
              You are running a doc drift check on a pull request in the VectorLint repository.
    
              The pull request checkout to inspect is located at:
                ${WORKSPACE}
    
              Read the PR diff from this file:
                ${DIFF_PATH}
    
              Use the doc-drift skill. When you have finished, write one report file
              per behavioral change you identified, named sequentially:
                ${WORKSPACE}/.doc-drift-1.md
                ${WORKSPACE}/.doc-drift-2.md
                ... and so on.
    
              If there are no issues to report, write a single file ${WORKSPACE}/.doc-drift-1.md
              containing the no-issues-found report.
    
              Do not post anything to GitHub directly. The workflow will handle posting.
              EOF
    

    The heredoc produces a routing message that tells Pi where the PR checkout lives, where to read the diff, and where to write its reports. The variables expand at runtime against github.workspace.

    The doc-drift skill it references lives at .agents/skills/doc-drift/, the same skill you created in Step 1.

    Run the Drift Check

    With the diff on disk, the routing message ready, and Node.js available, the workflow can run Pi and hand it the routing message. This is where the agent reasons about whether documentation needs updating.

    A CI runner has no interactive terminal, so Pi runs in a headless, non-interactive mode.

          - name: Run doc drift check
            working-directory: pr
            env:
              AWS_BEARER_TOKEN_BEDROCK: ${{ secrets.PI_BEDROCK_API_KEY }}
              AWS_REGION: ${{ secrets.PI_BEDROCK_REGION }}
              PI_MODEL: ${{ secrets.PI_MODEL }}
            run: |
              pi --no-session -p \
                --provider amazon-bedrock \
                --model "$PI_MODEL" \
                --skill ../main/.agents/skills/doc-drift \
                "/skill:doc-drift $(cat /tmp/pi-message.txt)"
    

    The step runs with working-directory: pr so Pi operates in the PR checkout. --skill ../main/.agents/skills/doc-drift points at the doc-drift skill in the main checkout (one directory up from pr). --no-session makes sure the session isn’t saved, and -p prints the response and exits. Both flags give you non-interactive execution.

    When the agent finishes, it writes one report file per behavioral change to numbered paths like .doc-drift-1.md, which the next step picks up. AWS_BEARER_TOKEN_BEDROCK, AWS_REGION, and PI_MODEL come from repository secrets you configure in Step 4.

    Post the Findings as PR Comments

    The agent is a language model, inherently nondeterministic. Letting it post directly to GitHub would make posting unpredictable. It could emit partial output, retry mid-run, or fail halfway through a comment. A file-based handoff sidesteps that.

          - name: Post report comments
            env:
              GH_TOKEN: ${{ steps.app-token.outputs.token }}
            run: |
              REPORT_FILES=$(ls "$GITHUB_WORKSPACE"/pr/.doc-drift-*.md 2>/dev/null | sort -V)
              if [ -z "$REPORT_FILES" ]; then
                gh pr comment --repo ${{ github.repository }} ${{ github.event.issue.number }} \
                  --body "Doc drift check completed but produced no output. Check the [Actions log](${{ github.server_url }}/${{ github.repository }}/actions/runs/${{ github.run_id }}) for details."
              else
                for file in $REPORT_FILES; do
                  gh pr comment --repo ${{ github.repository }} ${{ github.event.issue.number }} --body-file "$file"
                done
              fi
    
          - name: Post failure comment
            if: failure()
            env:
              GH_TOKEN: ${{ steps.app-token.outputs.token }}
            run: |
              gh pr comment --repo ${{ github.repository }} ${{ github.event.issue.number }} \
                --body "Doc drift check failed. Check the [Actions log](${{ github.server_url }}/${{ github.repository }}/actions/runs/${{ github.run_id }}) for details."
    

    The step lists all .doc-drift-*.md files in the pr checkout and loops through them, posting each one as a PR comment with gh pr comment --body-file. The agent never posts to GitHub itself. It only writes files, and the shell loop posts the comments to the PR, producing the same behavior on every run. The workflow passes the App token to gh pr comment for the same reason as every other write: GITHUB_TOKEN would 403 on issue_comment triggers for public repositories.

    The workflow owning all GitHub writes keeps the agent’s permissions minimal and makes every comment traceable.

    Two fallback paths handle edge cases. If the run produces no report files, a comment tells the reviewer and links to the Actions log. If the run fails outright, the failure() step catches the failure and posts a failure notice with the same log link.

    The Complete Workflow

    Here’s the full workflow for copy-pasting.

    name: Doc Drift Check
    
    on:
      issue_comment:
        types: [created]
    
    jobs:
      authorize:
        name: Check authorization
        runs-on: ubuntu-latest
        # Only run on PR comments that start with /check-docs (skip bots)
        if: |
          github.event.issue.pull_request != null &&
          startsWith(github.event.comment.body, '/check-docs') &&
          !contains(github.event.comment.user.login, '[bot]')
        permissions:
          issues: write
          pull-requests: read
          contents: read
        outputs:
          authorized: ${{ steps.auth.outputs.authorized }}
        steps:
          - name: Generate GitHub App token
            id: app-token
            uses: actions/create-github-app-token@bcd2ba49218906704ab6c1aa796996da409d3eb1 # v3.2.0
            with:
              app-id: ${{ secrets.APP_ID }}
              private-key: ${{ secrets.APP_PRIVATE_KEY }}
          - name: Check authorization
            id: auth
            uses: actions/github-script@f28e40c7f34bde8b3046d885e986cb6290c5673b
            with:
              github-token: ${{ steps.app-token.outputs.token }}
              script: |
                const association = context.payload.comment.author_association;
                if (!['OWNER', 'MEMBER'].includes(association)) {
                  await github.rest.issues.createComment({
                    owner: context.repo.owner,
                    repo: context.repo.repo,
                    issue_number: context.issue.number,
                    body: `@${context.payload.comment.user.login} Only repo owners or members can trigger doc drift checks.`
                  });
                  core.setOutput('authorized', 'false');
                } else {
                  core.setOutput('authorized', 'true');
                }
    
      check-docs:
        name: Check documentation drift
        runs-on: ubuntu-latest
        needs: authorize
        if: needs.authorize.outputs.authorized == 'true'
        permissions:
          issues: write
          pull-requests: read
          contents: read
        steps:
          - name: Generate GitHub App token
            id: app-token
            uses: actions/create-github-app-token@bcd2ba49218906704ab6c1aa796996da409d3eb1 # v3.2.0
            with:
              app-id: ${{ secrets.APP_ID }}
              private-key: ${{ secrets.APP_PRIVATE_KEY }}
          - name: React to comment
            uses: actions/github-script@f28e40c7f34bde8b3046d885e986cb6290c5673b
            with:
              github-token: ${{ steps.app-token.outputs.token }}
              script: |
                await github.rest.reactions.createForIssueComment({
                  owner: context.repo.owner,
                  repo: context.repo.repo,
                  comment_id: context.payload.comment.id,
                  content: 'eyes'
                });
          - name: Get PR head SHA
            id: pr
            uses: actions/github-script@f28e40c7f34bde8b3046d885e986cb6290c5673b
            with:
              github-token: ${{ steps.app-token.outputs.token }}
              script: |
                const pr = await github.rest.pulls.get({
                  owner: context.repo.owner,
                  repo: context.repo.repo,
                  pull_number: context.issue.number
                });
                core.setOutput('head_sha', pr.data.head.sha);
          - name: Checkout main branch
            uses: actions/checkout@34e114876b0b11c390a56381ad16ebd13914f8d5
            with:
              ref: ${{ github.event.repository.default_branch }}
              path: main
              fetch-depth: 0
          - name: Checkout PR branch
            uses: actions/checkout@34e114876b0b11c390a56381ad16ebd13914f8d5
            with:
              ref: ${{ steps.pr.outputs.head_sha }}
              path: pr
              fetch-depth: 0
          - name: Setup Node.js
            uses: actions/setup-node@49933ea5288caeca8642d1e84afbd3f7d6820020
            with:
              node-version: '22'
          - name: Install Pi
            run: npm install -g @earendil-works/pi-coding-agent@0.79.6
          - name: Show Pi version
            run: pi --version
          - name: Fetch PR diff
            env:
              GH_TOKEN: ${{ steps.app-token.outputs.token }}
            run: |
              DIFF_PATH="$GITHUB_WORKSPACE/pr/.doc-drift-input.diff"
              gh pr diff --repo ${{ github.repository }} ${{ github.event.issue.number }} > "$DIFF_PATH"
              echo "Diff size: $(wc -l < "$DIFF_PATH") lines"
          - name: Build agent message
            run: |
              WORKSPACE="${{ github.workspace }}/pr"
              DIFF_PATH="$WORKSPACE/.doc-drift-input.diff"
              cat > /tmp/pi-message.txt <<EOF
              You are running a doc drift check on a pull request in the VectorLint repository.
    
              The pull request checkout to inspect is located at:
                ${WORKSPACE}
    
              Read the PR diff from this file:
                ${DIFF_PATH}
    
              Use the doc-drift skill. When you have finished, write one report file
              per behavioral change you identified, named sequentially:
                ${WORKSPACE}/.doc-drift-1.md
                ${WORKSPACE}/.doc-drift-2.md
                ... and so on.
    
              If there are no issues to report, write a single file ${WORKSPACE}/.doc-drift-1.md
              containing the no-issues-found report.
    
              Do not post anything to GitHub directly. The workflow will handle posting.
              EOF
          - name: Run doc drift check
            working-directory: pr
            env:
              AWS_BEARER_TOKEN_BEDROCK: ${{ secrets.PI_BEDROCK_API_KEY }}
              AWS_REGION: ${{ secrets.PI_BEDROCK_REGION }}
              PI_MODEL: ${{ secrets.PI_MODEL }}
            run: |
              pi --no-session -p \
                --provider amazon-bedrock \
                --model "$PI_MODEL" \
                --skill ../main/.agents/skills/doc-drift \
                "/skill:doc-drift $(cat /tmp/pi-message.txt)"
          - name: Post report comments
            env:
              GH_TOKEN: ${{ steps.app-token.outputs.token }}
            run: |
              REPORT_FILES=$(ls "$GITHUB_WORKSPACE"/pr/.doc-drift-*.md 2>/dev/null | sort -V)
              if [ -z "$REPORT_FILES" ]; then
                gh pr comment --repo ${{ github.repository }} ${{ github.event.issue.number }} \
                  --body "Doc drift check completed but produced no output. Check the [Actions log](${{ github.server_url }}/${{ github.repository }}/actions/runs/${{ github.run_id }}) for details."
              else
                for file in $REPORT_FILES; do
                  gh pr comment --repo ${{ github.repository }} ${{ github.event.issue.number }} --body-file "$file"
                done
              fi
          - name: Post failure comment
            if: failure()
            env:
              GH_TOKEN: ${{ steps.app-token.outputs.token }}
            run: |
              gh pr comment --repo ${{ github.repository }} ${{ github.event.issue.number }} \
                --body "Doc drift check failed. Check the [Actions log](${{ github.server_url }}/${{ github.repository }}/actions/runs/${{ github.run_id }}) for details."
    

    Step 4: Configure the Secrets

    Add five repository secrets under Settings → Secrets and variables → Actions in your GitHub account.

    GitHub App secrets:
    APP_ID: the numeric App ID from the App’s General settings page
    APP_PRIVATE_KEY: the contents of the .pem private key file

    Provider secrets:
    PI_BEDROCK_API_KEY
    PI_BEDROCK_REGION
    PI_MODEL

    For other providers, change the --provider flag in the workflow and the environment variable names to match. For example, Anthropic needs --provider anthropic and only two secrets ANTHROPIC_API_KEY and PI_MODEL. Check the Pi provider documentation for the environment variable your provider expects.

    Step 5: Test the Workflow

    On any pull request, leave a comment starting with /check-docs as a repo owner or member. The workflow confirms you’re authorized, runs the agent against the PR diff, and posts one comment per behavioral change the agent found. Here’s a drift finding:

    ## ⚠️ Doc drift - renamed the `--output` flag to `--format`
    
    ### `docs/guides/cli-reference.md` - Output formats
    
    **What the doc claims:** "Run `vectorlint doc.md --output line` for terminal output."
    **What's now true:** The flag is `--format`, not `--output`.
    
    Fix prompt:
    ~~~
    `docs/guides/cli-reference.md`, Output formats: "--output" is no longer accurate - the flag is now `--format`. Update it. Keep all existing structure, tone, and style.
    ~~~
    

    Every surfaced drift finding has a fix prompt. The check tells you what broke, and the prompt gives you a starting point to fix it.

    Not every PR drifts documentation. When the agent finds a new user-facing change that isn’t documented yet, the comment names the change and its location. When nothing needs attention, you get a confirmation comment with the files and changes it checked.

    Handling False Positives and Negatives

    AI models are probabilistic, so there’s bound to be some false positives and negatives.

    The agent might flag product changes as documentation drift when they aren’t, or miss drifts when a PR genuinely invalidates documentation.

    When you notice either problem, update the instruction in the docs-drift skill. Add a concrete instruction that names the pattern, states what the agent should do differently, and includes an example if the rule isn’t obvious. Then test it locally on the same code change to verify it covers the edge case.

    These misses are less frequent with more capable models. If you observe consistent false positives or negatives, consider upgrading to a more capable model.

    Resolving the Doc Drift

    At this point, your workflow catches documentation drift at the PR level. When a PR changes documented behavior, the agent flags it in the PR itself, no platform required.

    The simplest approach to resolving the drift is to update the documentation in the same PR. You can hand the fix message to an agent to update the relevant docs, or build an agent workflow to create a PR based on detected drift.

    You’ll need guardrails, constraints, and verification signals to keep the agent’s output accurate, on-style, and useful. These would let you quickly confirm the agent’s work is correct and provide feedback so the agent can self-correct.

    Building those guardrails is a project in itself and requires iteration. You need style-aware instructions, verification checks, and feedback loops that let you quickly assess the agent’s output and improve performance over time.

    For teams without a dedicated docs engineer, hiring an external documentation engineering service is often more cost-effective and efficient.

    At TinyRocket, we build automated workflows, agent skills, verification loops, and tools that help teams keep documentation in sync with their product. Our agentic workflows let your team focus on building while reducing documentation work to a matter of quick judgment. Book a call today to get a free documentation workflow audit.

  • What Is Content Engineering for Developer Tools?

    What Is Content Engineering for Developer Tools?

    Content engineering, or content operations engineering, has a slightly different definition depending on who you ask.

    In enterprise content management, it means applying engineering principles to structure content into reusable modules, manage metadata and taxonomies, and deliver content across channels.

    In marketing and search engine optimization (SEO), it means building workflows, automation, and AI to create, update, and distribute content at scale.

    For developer tool companies, content engineering is an extension of documentation engineering.

    Documentation engineering is the practice of building systems that keep docs aligned as the product evolves. Content engineering extends it to marketing content by building workflows, quality gates, and automation that keep blog posts, tutorials, guides, and launch pages in sync with the product as it ships.

    Regardless of how each industry defines it or the tools involved, the common goal is to treat content as a systems problem rather than a series of one-off deliverables.

    Content engineering is emerging now because teams want to use AI to gain efficiency and scale content without a proportional increase in effort. AI tools can produce content quickly, but teams have realized that speed without a system leads to inconsistent quality.

    This is especially important for developer tool companies as AI increases development velocity.

    Why Developer Tools Need Content Engineering

    More features shipping faster means more content to produce and maintain, more frequently. For developer tools that pose a risk of content drifting from the product.

    Documentation is part of the product, and developers judge your tool by how well your docs help them ship. So when content is out of sync with your product, developer experience degrades.

    A stale code sample, a deprecated API reference, or a tutorial that no longer reflects the current UI would cause developers to spend more time verifying your tool instead of building with it.

    It also affects how you get surfaced in AI search. AI assistants that read your content use your documentation and marketing pages as a retrieval context. If your docs and marketing pages are factually inconsistent or riddled with terminology inconsistencies, they can surface contradictory product explanations or omit your product altogether.

    The good thing is that developer tool companies already use foundational infrastructure such as Git and running CI/CD pipelines, so adopting content engineering practices is a natural extension.

    If you’re already practicing Docs as Code, content engineering builds on that foundation.

    What Content Engineering Looks Like in Practice

    Whatever happens repeatedly in your editorial workflow is a candidate for automating away in a content system. It could be fixing broken links, handling drift, or fixing terminology inconsistencies.

    For instance, if your docs live in the codebase, you can detect documentation drift by using a code review tool that can inspect pull requests for changed features and flag affected content for review. Tools such as Qodo and CodeRabbit does this quite well. If your docs live outside the repository, however, you would need to build a system that monitors releases or change logs, cross-references them with the content, and surfaces outdated pages.

    Surfacing outdated pages could then automatically create a GitHub issue or a Slack notification to update the team.

    AI can reduce manual work, but it shouldn’t make decisions for you. An agent can read and identify the sections that need changes, suggest revisions, and draft a first pass, but a human should still make the final decision to publish.

    Although AI workflows can speed up work, a human still needs to remain accountable.

    How Content Engineering Supports Developer Marketing

    Content engineering supports developer marketing by helping you decide what to publish, write it, review it, and keep it consistent as your product changes.

    You can build a repeatable workflow with a topic backlog, a brief template, a source-gathering step, quality checks, and a publishing process to bring in users, create search entry points, and explain your product well enough to earn trust.

    This is how we built our demand generation workflow. We use AI for topic research and prioritization, while a human (just me for now) signs off on what to write, and briefs before handing it off to an agent who writes the first draft.

    After that, the draft goes through automated quality checks, the agent revises until it meets our quality benchmark, and the human gives the final review. This setup enables one person to keep content moving while also handling software engineering work.

    It could also be an event-driven system.

    A feature launch can trigger an event that creates a content backlog, generates a brief from the changelog and source docs, drafts a tutorial or comparison post, and then runs checks for claims, terminology, and links before human review.

    Whatever workflow is implemented, it must make content creation faster without sacrificing quality.

    Benefits of Adopting Content Engineering Practices

    Implementing a content system reduces content drift and maintains a good developer experience.

    A content system also enforces consistency, making it easier for AI systems to trust and cite. Consistent, technically grounded content gives AI systems an unambiguous representation to work from, improving search visibility.

    It also ensures that content quality doesn’t slip as you scale volume. Enforcing quality checks at the writing and submission stages helps you expand your topical coverage while keeping every piece aligned with the same standards.

    Building a content system is also cost-effective. Not only does it reduce the workload on already overloaded technical writers or engineers, but it also enables you to scale production without a proportional increase in effort and resources.

    Snyk was able to scale its developer marketing strategy by adopting content engineering practices, scaling its developer content production, and driving hundreds of thousands of additional web sessions

    In-House vs Outsourcing Content Engineering

    You could hire a content engineer to build your content system, or have an in-house technical writer fill the role.

    Building a content system is ongoing work, though. The content engineer builds workflows, connects product development to content systems, adds quality gates, sets up knowledge bases, and improves the AI-assisted components when new tasks break the system. AI outputs aren’t deterministic, so the workflow needs ongoing calibration against your quality standards.

    Technical writers already juggle documentation, reviews, and contributor support. Adding content engineering to their tasks forces them to context-switch between writing and systems work, which can lead to more content debt or an inefficient system.

    At TinyRocket, we build content systems for developer tool companies when your team doesn’t have the capacity to take it on without diverting from the roadmap. We connect pull requests, releases, and change logs to your content inventory, route updates to the right owner, and set up quality-gated production workflows that keep documentation and marketing content aligned with product development.

    Book a free workflow audit for an analysis of your editorial process to see where you could automate or apply AI to keep your docs aligned or produce more developer content without sacrificing quality.